 |
| (LEGOs > Warhammer 40k. Clearly.) |
Hey everyone, Xethik here again. This time around I wanted to do a bit on the whats, whys, and hows of castling up. This involves some basic deployment and unit strategies but really has to be adjusted by the player exactly fit the opposition. While this is about Grey Knights, it can really apply to any "elite" army (an elite army being one with a small model count). With so many less models than most other armies out there (that die practically as quickly), you really want to try to even the points by performing some particular tactics. But first, lets talk about when and why.
So, let us first assume you are running a pretty standard list of mostly Grey Knights.You'll probably have either 2 Dreadnoughts and a Land Raider or 1 Dreadnought and 2 Land Raiders and two or three Grey Knight squads, a squad of Terminators, and maybe an Inquisitor bringing in an assassin.
Now, you are about to deploy against your opponent and you know what army they are playing and perhaps you know a bit of how their list is played. If you are going up against either an assault oriented army or a close-range shooting with assault elements (such as an average Space Marine list), chances are you might want to try and castle-up. You want to try to break down their force as much as possible before they get close. If your opponent is a long-range shooting list such as Imperial Guard or Tau, this probably isn't the best option. In those cases you are better off trying something else, a post of its own. Now let us assume you get first turn either from it being forced upon you or you choosing it, etc. Going first with this is probably your best bet in most cases, but not all of them. Deep striking armies and the such you will probably want to go second and reserve your army. As it comes onto the table, lash out and try to set-up in a similar way to what I will say below. Going first also means you deploy first and usually means you pick your table half. Immediately you want to try to find an area that has a lot of nice terrain to try to squeeze your force into and funnel your opponents towards you and that is preferably in the back of your deployment. As long as your opponent doesn't have massive large blast templates all over, you want to try to squeeze tight together. A common thing to do is to have your Land Raider(s) facing forward with you Dread()s at the back corners, getting a cover save from most forward fire while still (hopefully) allowing you to shoot back with long-range weapons. If you see a really nice spot to get a cover save separate from behind your Land Raider and a bit closer to the front, try fitting there and setting your second Dreadnought just behind the first. The first Dreadnought gets a cover save from terrain while the second gets a cover save from the first Dreadnought. If you have two infantry squads you can deploy them near the Land Raider, hopefully camping in area terrain or somewhere they could get a nice cover save. A third power armor squad can be placed either in your forward most area, right next to your Land Raider or off to the side, too. Terminators can either go into reserves, be also placed in terrain, or put inside the Land Raider to avoid getting shot down immediately. Throw your Inquisitor in a squad it suits well and your assassin will probably have its own niche spot or be in reserves.
 |
| My vehicles are sure Grey... |
I hope that image above gives a nice idea. You probably won't have the terrain that compact, but that is fine. I just wanted to put it close so you could see what was going on. Also, I obviously didn't do full squads as I was trying to make the picture up quickly.
Now, let us quickly mention going second. Going second means you can deploy second and attempt to steal initiative. Deploying after your opponent means you can see where the bulk of their force lies. You want to deploy directly opposite of that, increasing the time it takes to get to you. If they deploy as close as possible in the left, deploy as far as possible in the right. If they deploy middle, try to find a nice spot to either side to castle-up. If they deploy all over, try to identify the biggest threat or strong area of the army and deploy opposite of that.
Deployment is over now, so it comes to first turn. Each unit in your army has a different role and there are some different tactics with each.
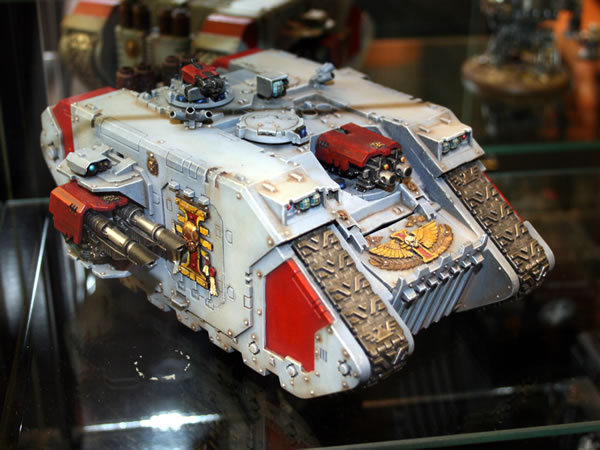 |
| Land Raider from Gamesday |
Let us start with the Land Raider or Land Raiders. Most standard Space Marine players roll the Land Raider down field, popping smoke one turn and then (hopefully) disembarking and assaulting the next. With Castle-tactics, that probably isn't the greatest of ideas. You want to use your Land Raider defensively. That means giving cover saves to what needs them and keeping units inside safe. Often, I deploy my Terminators inside the Land Raider but they soon get out to help with the firing and the counter-assault if any of my other squads get weak. As a squad of Grey Knights gets down to one to three squad members and I feel I really need the save the kill point or keep a scoring troop alive I move them to the side entrance of the Land Raider, disembark my Terminators and put them inside. If my squads have not been hurt heavily, I might use my Land Raider to bring Terminators forward to cut-down opponents before they get to my front-line, but I'll talk about that a bit more when I mention Terminators. Last of all, but possibly most importantly, the Land Raider is a firebase. The Power of the Machine Spirit allows the Land Raider to shoot an additional weapon at a separate target than the others, allowing you to (hopefully) kill two separate targets a turn with the Lascannons. Target priority is pretty simple. You want to be aiming the lascannons at transport vehicles. Dark Eldar Raiders, Marine Rhinos and Razorbacks, Imperium Chimeras, Witchhunter Immolators, Eldar Wave Serpents, and so on and so forth. Other Land Raiders you will probably want to ignore at first. You really want to demechanize your opponent so that your troops have some targets to shoot at and slow them down. If you immobilize a vehicle, that usually means your opponent will disembark himself and you can switch to a different target next turn. You also want to be sure to stop any Vindicators or Demolisher like vehicles from firing at you. Vehicles like this drop high strength (8-10) blasts on your line and you don't want them to blast away your 300 point Grey Knight squad with one shot. Keeping them shaken or getting a weapon destroy (or immobilizing them out of range) is usually enough to ignore that vehicle for a while. A vehicle like a Medusa or Manticore that is meant to blast away vehicles from a decently far range will be your most annoying targets, but you will have to do your best to kill them. It is unlikely an assault based army will be using these, but it is possible so watch out.
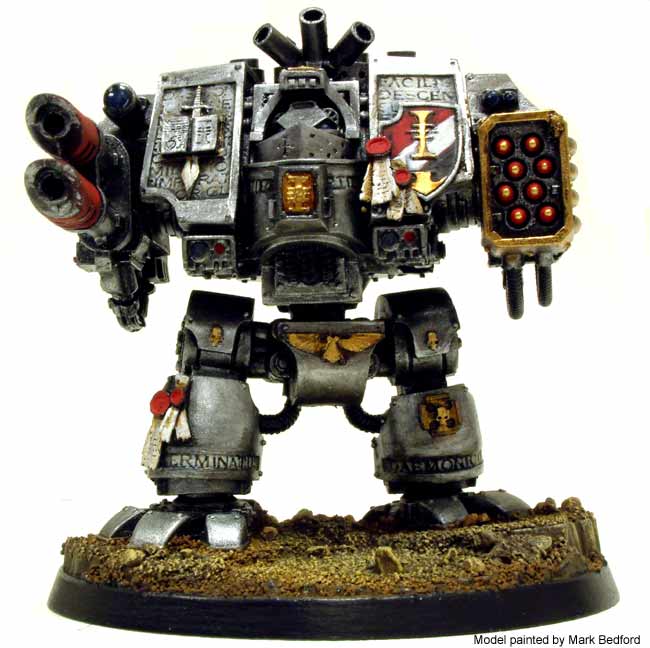 |
| Forgeworld Grey Knights Dreadnought |
Dreadnoughts are very similar to Land Raiders in their long range firing. Aim for low armor transports and demechanize your opponent while trying to keep short ranged siege vehicles from firing. One thing different with your Dreadnoughts is that you have a powerful Strength 10 in close-combat. When your opponent is about 24" away from your Dreadnoughts you should move them forward 6". This means they will be 18" away from your opponent so if they move forward 6", you will be 12" away or so, assault range. If your opponent lacks long range anti-tank, like Lascannons or mass Autocannons/Missile Launchers, you should move them forward to be right next to the front of your Land Raider early on. Again, you want your Dreadnoughts to get in assault range before your opponents hit your Grey Knight squads, so move your squads around accordingly to make sure they are protected by your Dreadnoughts. Dreadnoughts can be used as speed-bumps against your opponent. Throw them at your enemy and assault them to slow them down. If your Grey Knight squads are still strong you can also send them to assault the same target as your troop squads, adding a bit of an extra punch to that assault. If your opponent is aiming at them (or you think they will) pop your Smoke Launchers and instead run in the shooting phase to get a better position. You don't want to get too close, though. Make sure you are more than 12" away when you end your movement. You don't want your opponent to get in melta range or assault range. You want your opponents to have to get close to your Dreadnoughts if they want to get to your infantry squads. Move accordingly from the start of the game to make sure that happens or deploy them a bit closer. You really want to make sure they aren't out in the open or too close though, or they will go down to anti-tank fire quite easily. Deployment is key with these guys. Make sure objective placement pushes them close to the Dreadnoughts and if you see a really nice spot to keep them close to majority of your units, deploy them there instead of behind your Land Raider. Don't spread out too much though or your opponent will abuse your weak flank.
 |
Your infantry squads will be one of the key parts of your army. The rest of your army will be focused on making them able to get some shooting targets and keeping them alive. That said, you don't want to think of them as a Devastator squad or Long Fangs that are stationary targets that will die in the assault. You want to stay out of close-combat with any squad that will be able to defeat you but still in range for shooting. Target priority is pretty simple. You want to use your long-range and mobile fire power for a nice combo. Shoot at infantry squads on foot that are in range (go go targeters!) or at a low armor value (11 or 10) vehicles coming at your front lines with Psycannons. You have a 36" range on your Psycannons when not moving, so you want to abuse that for as long as you can. Once your opponent gets close, you have two options. One is to move closer and assault them in order to deny them the extra attack or furious charge and two is to move back and delay the assault and keep firing on them. Unless the squad is so low on numbers that you can wipe them out without losing a squad member, the latter is usually better. But don't fall for bait. Moving up to your opponent will usually make your Knights more vulnerable, so if you feel you can finish them off with shooting don't bother getting closer. The second option above is often called backpeddling (which is not a bad thing in 40k, but can be in other games). You don't want to move back too early however. Let's assume your opponent does not have fleet but can magically roll 6's for any run move. If they end their turn about 18" away from you, you can move back 6" and shoot with your Storm Bolters (but no psycannons) and they will be 24" away. They more forward 12" and cannot assault and you move back 6" and shoot with psycannons and Storm Bolters. They move forward 12" and you either get closer and fire and counter-attack. Of course, they probably won't be rolling 6's for their run every time and might not run at all. Because of this I often move away when they are about 12" away. That gives you at least an extra round of shooting but maybe more depending on their run rolls (or if they run at all). Watch out for plasma or melta weapons when doing this, though. They can really thin your numbers down so it might be better to get into the assault before they reduce your squad into ribbons. Also try not to draw your opponent into cover, it makes your counter-assault that much weaker as you go at initiative 1. To make sure of this, put your objective near the Grey Knights but outside of cover. You want your opponent to choose whether to take out the Knights or try to make an early move for the objective. Your Dreadnought can also help with the counter-assault. Wash your opponent in some heavy flamer (if you bought it) and move in for the multi-assault.
 |
Next it is the Terminators turn. Depending on their deployment you can use them a couple different ways. You can put them in reserves, you can put them in the Land Raider, or you can put them in cover. Going second really helps here to figure out where to put these guys. If your opponent has a relatively undefended squad or objective, deep striking them allows you to put these guys right in on your opponents long range support or flank and can wreck them, especially when aided by an assassin. Deep striking also allows you to siphon off and speed bump your opponents. If they send their army barreling down towards you, you can deep strike these guys off to the side but in a threatening locations. Firing at them until they pull off a strong unit, you can buy some time for your front line and hopefully have your Terminators earn their points. Your opponent really has three options. One is to ignore the terminators. Hopefully you won't let them and you can force them to do something about the threat. Another is to pull off a small squad of send some fire their way from vehicles and/or squads moving forward and try to deal with them. Hopefully your Terminators will be able to weather the shots or assault and push on your opponents now probably weak flank. The last option is to send a strong unit, like 5 Thunder Hammer and Storm Shield Terminators to deal with your... probably 4 or 5 guys. Your opponent will likely have advantages over your guys and will save most of the attacks your put on them and defeat you in one round of close combat. This option might be your preferred one. It will hopefully slow down the incoming squad enough that you can deal with anything else they have coming your way and prepare to face this "deathstar" unit. Enough storm bolter and psycannon shots should hopefully be enough to take them down as hopefully you weakened them with your Terminators before they crushed you. If you put them in the Land Raider or in cover you want to use them as a counter-assault unit. You can backpeddle just like Grey Knights squads, but unless your opponent has no shooting elements, you might want to assault him as soon as possible. Pick a squad you know you can wipe out without losing much or anything or a squad you want to tie up. This could be a rather large Ork Boyz squad ('Ard Boyz are preferred. They get no saves either way and this way you take down a bigger threat), a Space Marine Assault Squad, or any other squad that might have some but not too many power weapons. A Sergeant with a power fist/weapon should be enough to manage, but if they have four or five guys with similar weapons you might want to consider weakening them down a lot more before moving in for the assault. Either way, use your powerful assault and decent range weapons for a great shooting volley-assault combo. This should wipe out anything that doesn't have a lot of invulnerable saves or a couple dozen models. Anything else might be stuck in combat with you for a while, which is good and bad. It could keep your Terminators safe from shooting and keep this powerful squad away from your troops while allowing the rest of your army to stay on task or it could end up with your Terminators getting slaughtered and simply speed bumping. But again, speed bumping is helpful, just don't give up too many kill points trying to slow them down.
 |
| Callidus Assassin on Games Workshops website |
The Assassin can be used similarly to the deep striking Grey Knight Terminators if you use the Callidus (which I will assume you will as she is my personal favorite). The Callidus assassin can be used with even more precision than Terminators because she does not scatter, so you can place her right next to an enemy infantry squad and finish them off. She isn't good at taking out entire squads, so use her to mop up weakened squads that have been shot to small numbers by the rest of your army or go for a long-range shooting squad your opponent has. Quite often she can take out an entire Devastator squad or Eldar Pathfinder by herself if you can roll well. Then again, I've had her punched in the face by rangers to death as I failed to even hit at all and my opponent managed two wounds, which I failed both of. Either way, if you don't roll poorly, she can be very powerful. You can also use her well in an assault with deathstar units effectively, but only if your opponent is already tied up. A Grey Knight Terminator with a Grand Master squad suddenly aided by an assassin can take out 5 Thunder Hammer Storm Shield Terminators before they can attack back if the Emperor gifts your dice (rolling only slightly above average).
I know this article was a bit lengthy, but I hope I covered all 5 W's and H with this article. I was considering splitting it up into several different articles to make it a bit easier on the eyes, but I assumed my lack of posting recently should really be responded to with a really nice and lengthy article. I'll try to be a bit more consistent with my posting soon, so hopefully you will have plenty to read. You should also note that this can really be done with any army list, though some work better than others. Imperial Guard allies really compliment this style with long range shooting, allowing you to demechanize your opponents a bit sooner and deliver some strong counter-assaults with the rest of your army.
Until next time, fight for the Emperor!
This entry was posted
on Tuesday, August 31, 2010
at Tuesday, August 31, 2010
and is filed under
daemonhunters,
grey knights
. You can follow any responses to this entry through the
comments feed
.


.JPG)


